Our colour and writing products are manufactured in our workshops in Geneva since 1915.
- FREE ENGRAVING UNTIL MAY 11, 2025 INCLUDED ON OUR HAUTE-ECRITURE COLLECTIONS.
- FREE GIFT WRAP AND PERSONALIZED MESSAGE. FREE DELIVERY ON ORDERS OVER CHF 60.
HALLOWEEN: THREE DIY CRAFT IDEAS FOR DECORATIONS TO MAKE WITH YOUR CHILDREN
Every fall, kids can hardly conceal their excitement at the idea of celebrating Halloween and dressing up on the 31st of October. Houses are filled with dark and spooky items of decoration: ghosts, witches, bats and pumpkins. To mark this spookiest of celebrations, Caran d'Ache has imagined three easy and novel DIY craft activities to make your own Halloween decorations.
Get out your paintbrushes, paints, pencils and paper, and get inspired to make the spookiest of Halloween decorations!
Get out your paintbrushes, paints, pencils and paper, and get inspired to make the spookiest of Halloween decorations!
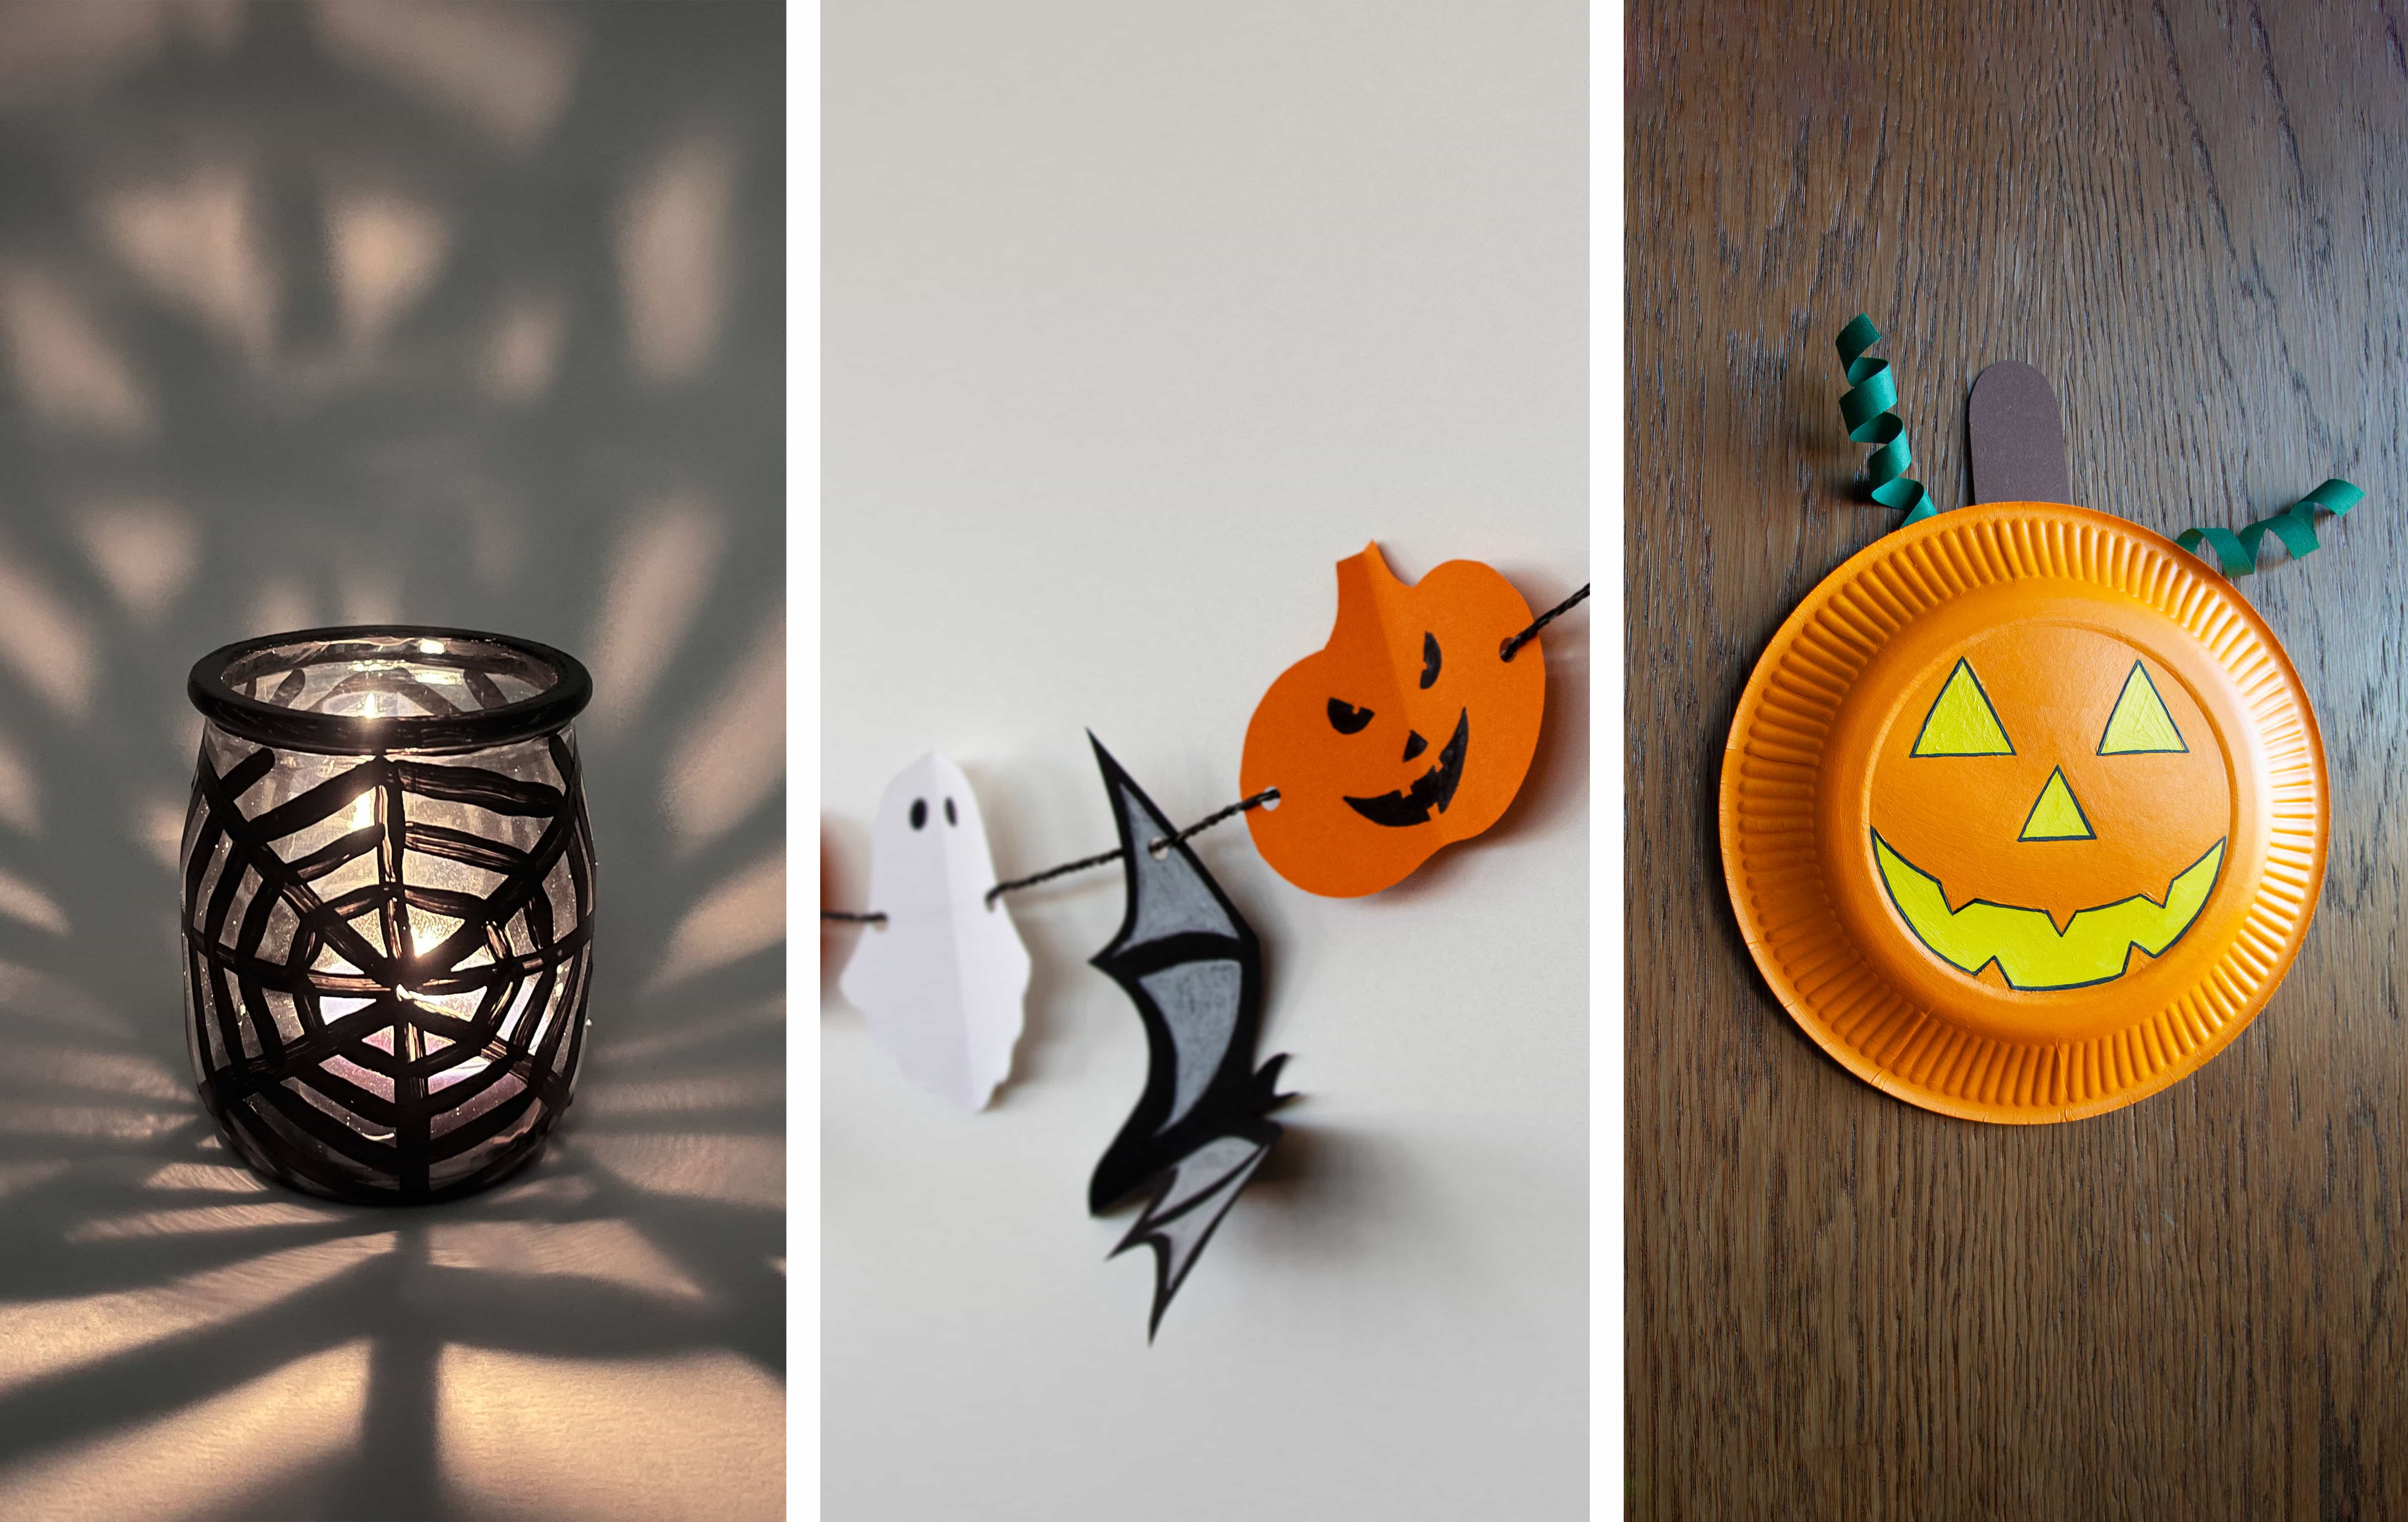
1. PERSONALIZE CANDLE JARS WITH PUMPKINS, BATS OR SPIDER WEBS
Make your guests shiver this Halloween with a mysterious atmosphere in your house thanks to the homemade decorations imagined by the artist Steffie Brocoli. Turn your glass jars into pumpkins, spider webs or spooky bats by transforming them into candle jars that will light up your Halloween table.
For this activity you will need:
• A pot of acrylic paint (in orange, black or white, depending on your chosen motifs)
• Painter's palette
• Black Fibralo felt tip pen
• Scrap paper
• Glass jars or pots
• Tealight candles
Follow Steffie Brocoli’s step-by-step craft candle jars
Draw a motif on paper
Cut out a piece of paper that is the same size as your glass jar and draw on it a jack-o'-lantern, a bat or a spider web using the black Fibralo felt tip pen.
Draw the outline of the motif on the glass jar
Slip the piece of paper inside the glass pot or jar in such a way that you can see the drawing. Paint the outside of the pot, using acrylic paint and a fine paintbrush to outline the motif. Make sure you only trace the outlines of the drawing, leaving the rest blank.
Apply a second layer of paint onto the jar
Let the paint dry, and then apply a new layer of acrylic paint onto the jar.
Place a candle inside the glass jar
Once the paint is dry, you can remove the paper and place a tealight candle inside the jar. Make sure you are by your child’s side during this step.
Admire your crafted candle jar’s spooky shadows
Wait until nightfall to observe the result of your homemade candle jar with your child. The shadows of a bat or a jack-o’-lantern will invade the room!
2. MAKE A BAT-THEMED GARLAND OR BUNTING
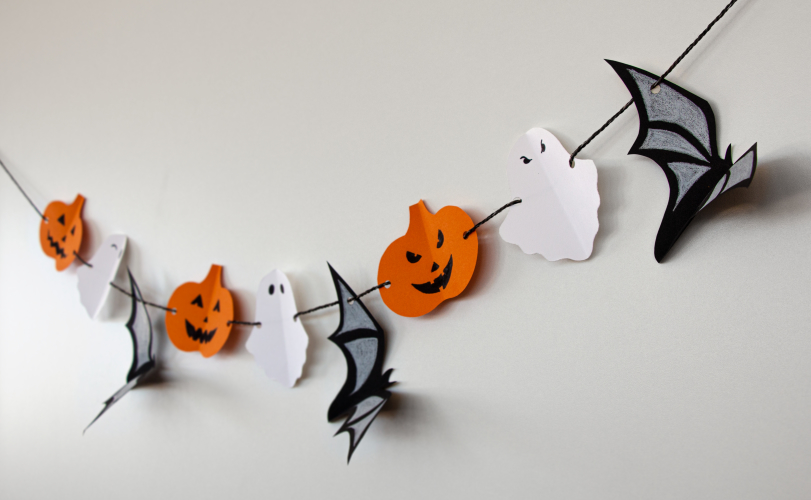
Halloween wouldn’t be the same without must-have Halloween garlands! You can be sure that this procession of bats will add a lot of atmosphere over your coffee table or up the staircase. Find out how to craft this DIY Halloween Garland with your kids thanks to our easy to understand and innovative tutorial.
For this activity you shall need:
• A sheet of thick black paper (200 GSM)
• A sheet of paper for the pattern
• Pair of scissors
• Hole puncher
• Permanent white colored pencil Pablo, Luminance or Swisscolor
• Black string
Follow these steps to craft your DIY bat garland
Trace a bat motif onto the sheet of paper
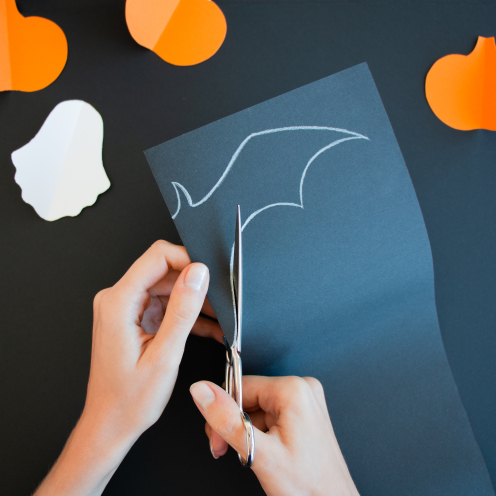
Fold the sheet of black paper in half. Trace the outline of half a bat with the white pencil, starting on the crease.
Cut out the outline of the bat drawing
Carefully cut out the outline of the bat drawing on the piece of folded paper, then add a few details, such as eyes. Unfold the piece of paper: here’s your first bat!
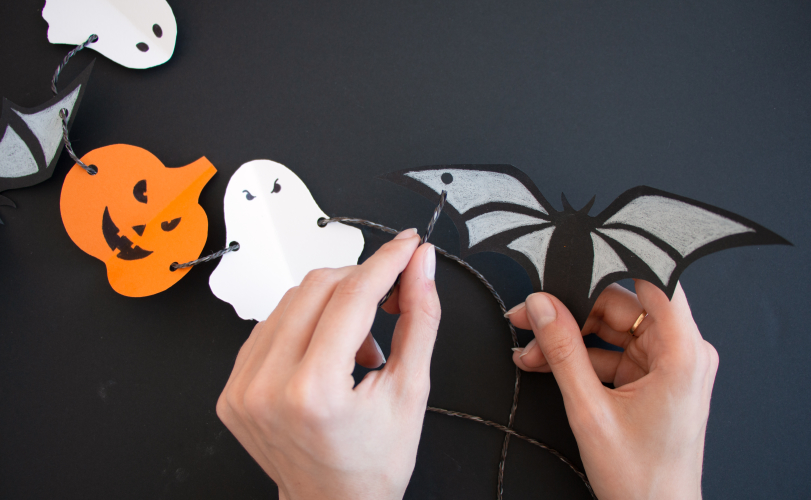
Place string between the cut-out bat shapes
Punch small holes into the ends of the bats, and string them together to hang them up. Your bat Halloween Garland is ready!
💡 You could try a variety of shapes, making a garland with ghosts and jack-o’-lanterns.
3. CRAFT A JACK-O'-LANTERN OUT OF A PAPER PLATE
Here is a quick and easy craft idea that kids will love at Halloween! With a little imagination, turn a paper plate into a jack-o’-lantern to hang in your home.
For this activity you will need:
• A wooden stick
• A hole puncher
• A graphite pencil
• A large acrylic paintbrush
• Tubes of acrylic paint in orange, primary yellow and burnt sienna
• Green chenille thread
• Masking tape or sticky tape
Here's how to transform your plate into a jack-o’-lantern
Draw the outlines of a pumpkin onto the plate
On the outside of the plate, use the graphite pencil to draw the eyes, nose and mouth to make a jack-o’-lantern.
Fill in the jack-o'-lantern's features
Using the tubes of yellow paint and a fine-tipped paintbrush, color in the features (eyes, nose and mouth). This will give the impression of a candle burning inside your jack-o'-lantern.
Paint the background on the inside of the paper plate.
Once the paint is dry, paint the rest of the plate in orange with a wide paintbrush. Your plate has now turned into a jack-o'-lantern!
Add some details to your paper jack-o'-lantern
To add a stalk to your pumpkin, paint a small stick with brown paint and attach it to the back of the plate. Finally, add a length of green pipe cleaner or chenille stem to imitate a pumpkin leaf.
Place your pumpkin outside your door
Now hang your pumpkin on your door by your window and there you have it! Now all you need to do is frighten your guests as they come through the door!
And why not share your crafty Halloween creations on your social media using the tag @carandache 🦇
🎃 Do you have pumpkins at home? Discover here our craft tutorial on customizing your jack-o'-lantern pumpkins for Halloween!
Free from CHF 60 purchase.
Possible return under 14 days.
Possible return under 14 days.
Monday to Friday from 10am to 7pm and Saturday from 10am to 5pm.
+41 (0) 848 558 558
(Calls from Switzerland : at local rate. Calls from abroad : at telecom provider’s international rate.)
+41 (0) 848 558 558
(Calls from Switzerland : at local rate. Calls from abroad : at telecom provider’s international rate.)


1.jpg)
1.jpg)
.jpg)
.jpg)
.jpg)

.jpg)


.jpg)
.jpg)


 Deutschland
 Austria
 Belgium
 Etats-Unis
 France
 Italy
Italy Japan
Japan Netherlands
 United Kingdom
 Switzerland